By Pauline Weston Thomas for Fashion-Era.com
The Basics of Fashion Sketching
Layout Paper
Fashion Silhouette Templates
Posture, Poses and Template Silhouettes
Free Fashion and Body Silhouettes
Suitable Paper Glues and Adhesives
Suitable Adhesives for Fabric
Cartridge Paper
Putty Rubber
Pencils
Coloured Pencils
Felt Pens
Fine Drawing Pens
Mounting Board
A Sharp Knife
Metal Ruler
Cutting Board
Masking Tape
Variety Fabrics
The Basics of Fashion Sketching
This section is for those nervous of fashion drawing.
You may have to do some fashion drawing as part of a course or you may simply want to sketch out an idea you have for a special evening dress, ball dress, wedding dress or bridesmaid's dresses.
With a little technique most people who insist they cannot draw can achieve a satisfactory fashion drawing. To aid results use some of the following items - you will find the list helpful if you do not have a clue where to start.
Layout Paper
Layout paper is a fine semi opaque paper that allows you to faintly see an image beneath it. This enables you to use a fashion or body template under the top sheet. It has a good quality for a semi opaque paper and is suitable for remounting onto firmer background papers and cards for presentation purposes.
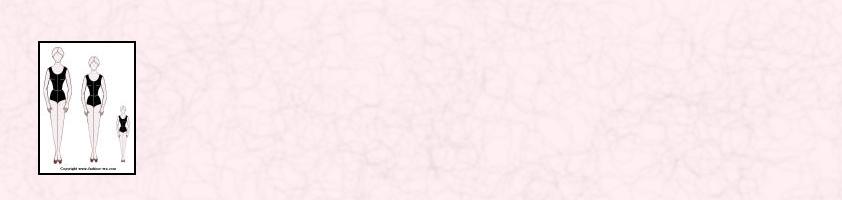
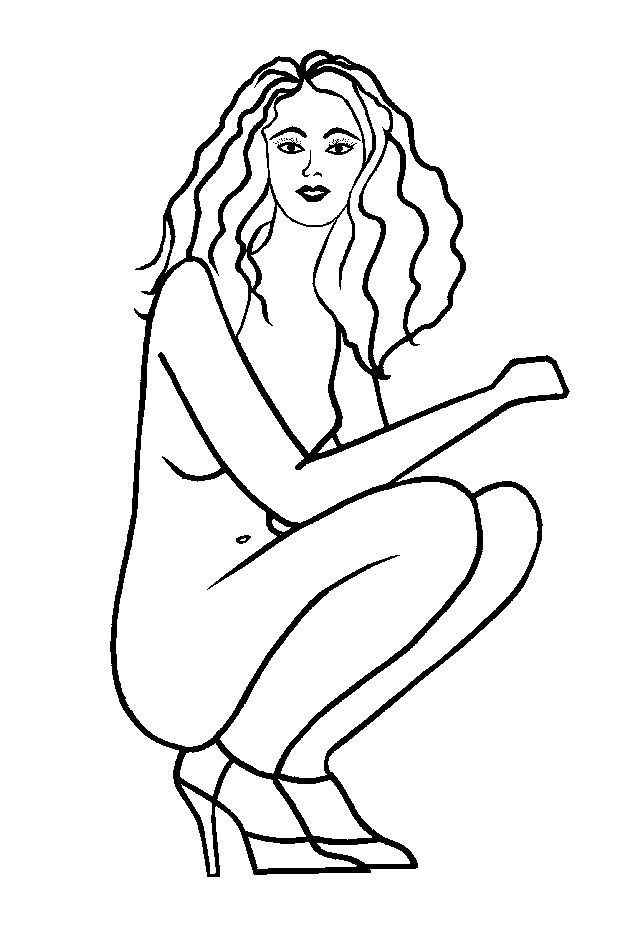
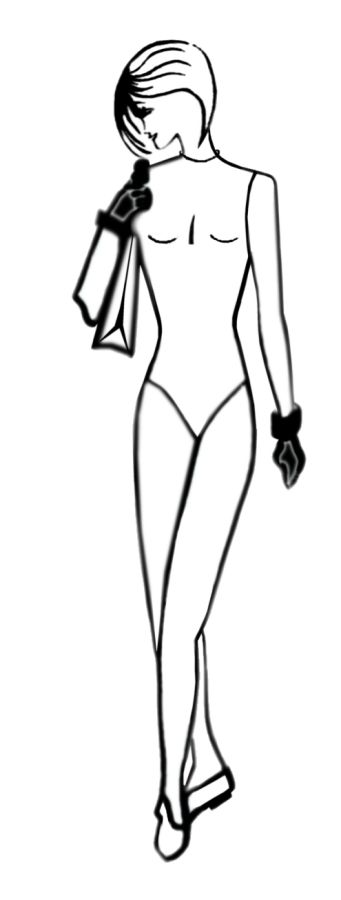
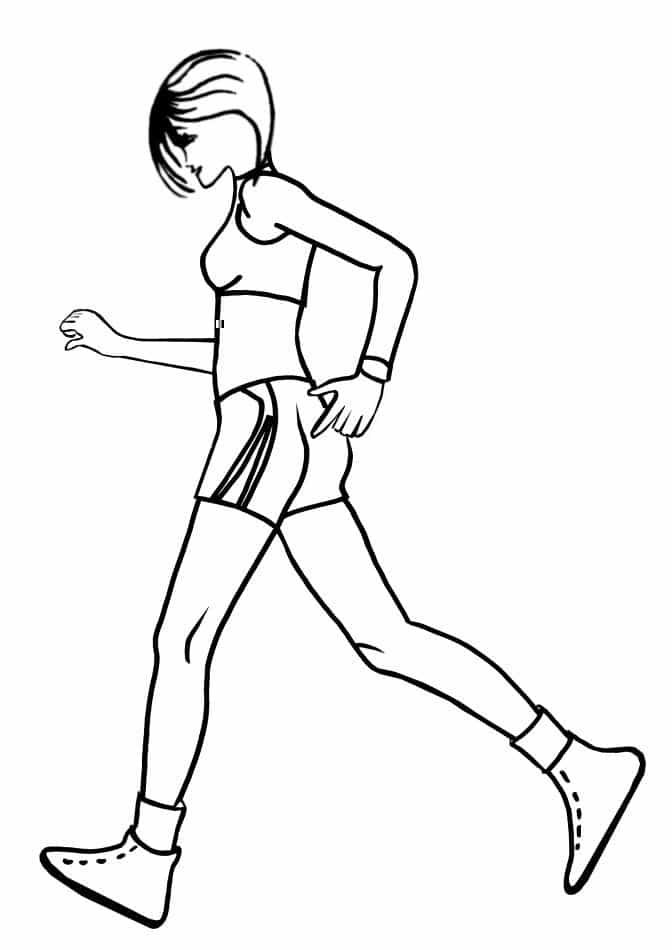
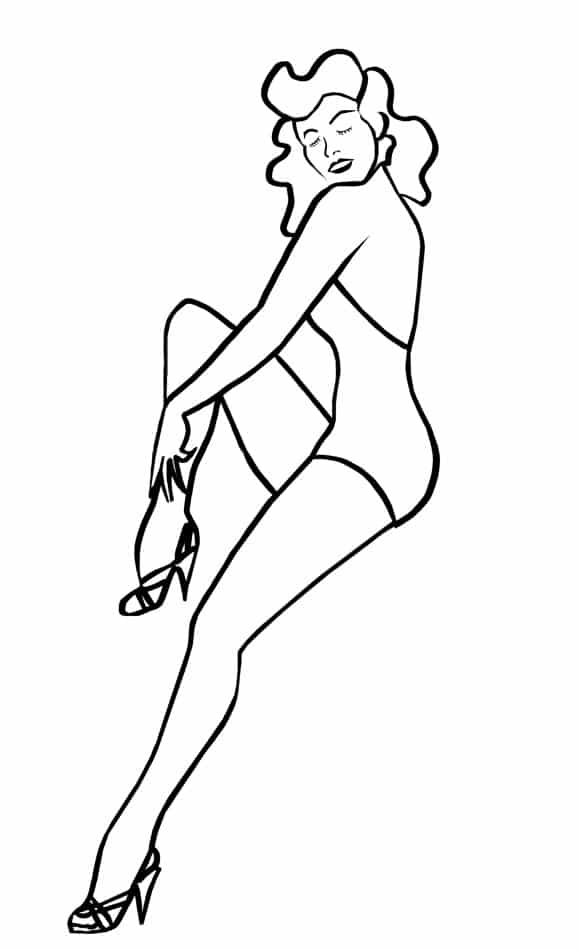
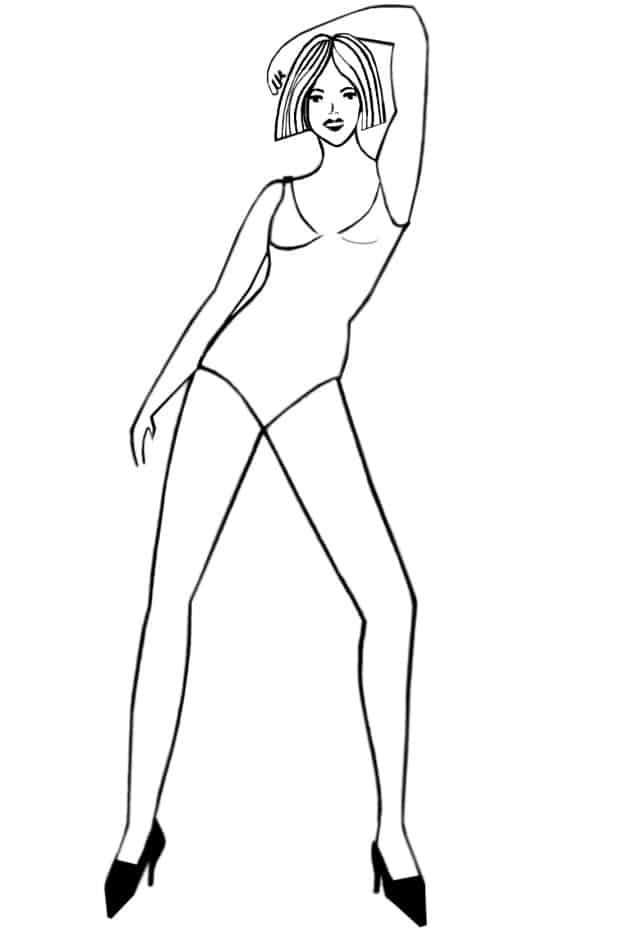
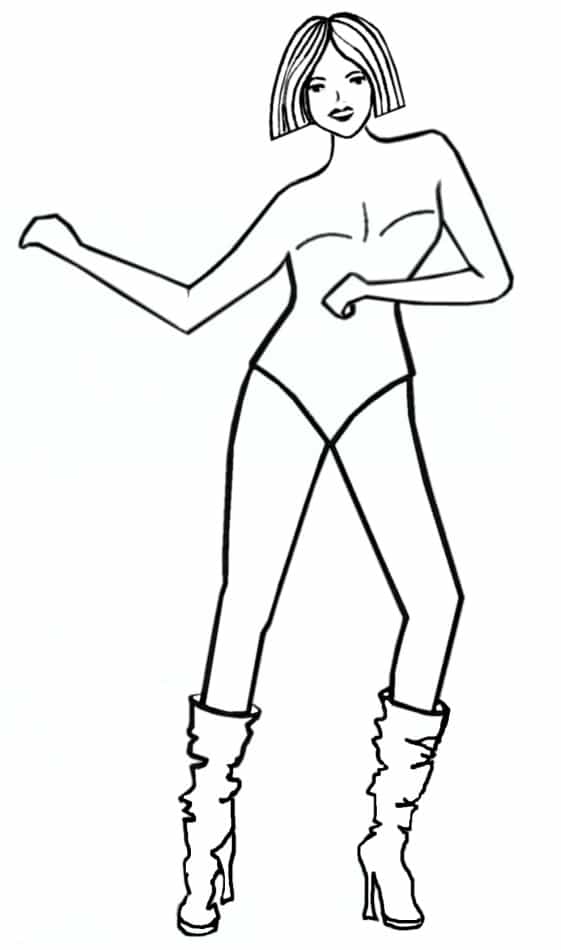
Fashion Silhouette Templates
The easiest way to draw fashion when you have limited skill is to use a template. Here are templates of a model pose in 3 sizes suitable for historical costume work or simple fashion designs.
Posture, Poses and Template Silhouettes
You should take care to note that anyone in period costume would stand more gracefully, sedately and modestly than a woman after 1960 might pose. So make any costume history drawings you do on very elegantly posed templates. Think about how the person you are trying to represent would look posture wise. If you can get the hair right you will also capture the spirit of an era.
The second factor for success is to keep to a theme when sketching a sheet of ideas. For example concentrate on interesting waist variations or necklines. The theme will give flow to your designs.
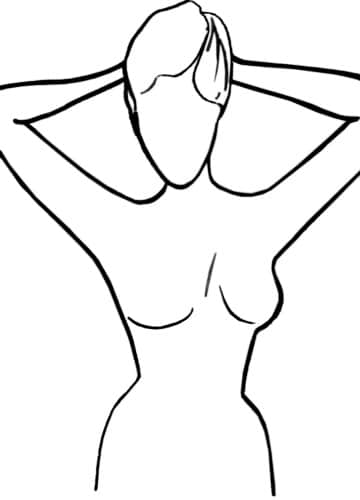
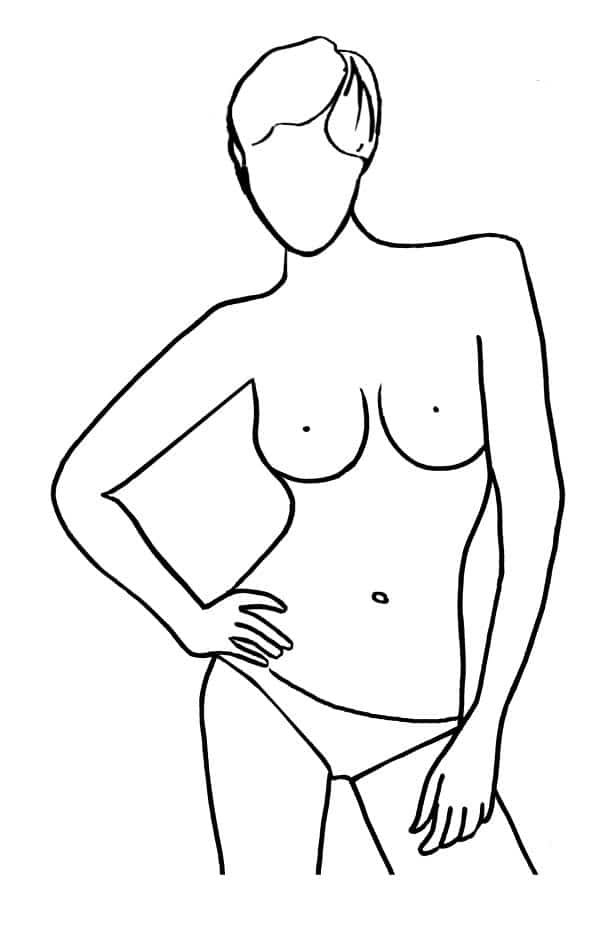
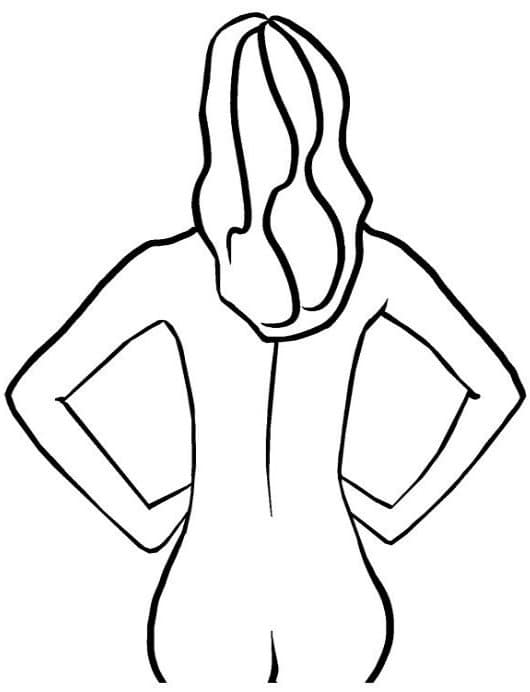
Free Fashion Templates and Body Silhouette Outlines
Here are some FREE basic body outline silhouette templates for you to download. They are very suitable for use sketching historical costumes before 1960, but could be used for a simple unfussy sketch outline to take to a dressmaker for example.

Basic Figure Templates
Copyright Fashion-era.com © 2002-2021
The files show silhouettes in various sizes giving you a small range of templates for most situations.BELOW - Front and back views of VERY basic model - Ideal for costume use as she stands daintily.


Click now on the thumbnails to enlarge and then print.
You may reproduce the images shown on this page for personal, school or college use for fashion drawing and collage work. They should not be reproduced for profit or sale purposes as part of a CD, DVD, ebook, book, or similar item. Nor should they be used for reproduction on T-shirts, accessories or other clothing.
Copyright Fashion-era.com © 2002-2021.
Suitable Paper Glues and Adhesives for Paper and Card
Use spray glues or light glue sticks for paper to affix the layout paper to a heavier white paper. Then when the layers are quite dry trim it to size and mount it onto fresh card or mounting board. Try to avoid PVA type glues which are inclined to wet the paper.
Cow Gum used sparingly will work, but can be messy. In a very well ventilated room I use petroleum based Cow Gum for sticking card to card.
Suitable Adhesives for Fabric
For sticking fabric and braids I have found general PVA glue, Copydex and Evostick wood glue all very good. Don't apply too much of any of the glues and do allow time for the glue to get tacky and thicker before applying the fabric, so that the fabric does not absorb glue through to the top surface.
Cartridge Paper
In addition to layout paper, cartridge paper is ideal for fashion drawing and is thick enough for light painting with gouache or watercolours. If you use a heavy bold black felt pen template beneath the cartridge paper you can see just enough of the template outline to get the line of the silhouette and the correct body proportions.
Putty Rubber
A putty rubber can be bought from an art supplies shop. It's very useful because unlike an ordinary eraser it does not rub away the background paper.
Pencils
Pencils for fashion drawing should be soft B pencils. You will need a B or 2B for general sketching and a 4B for highlight and emphasis. Keep the 2B quite sharp and use the 4B to make the emphasis mark you like best.
When you make the light trace of the template beneath your layout paper, be sure to ensure the trace is just that - light.
Coloured Pencils
I like Caran d'Ache coloured water soluble pencils. These high quality Swiss made water soluble colour pencils come in 2 types - the Caran d'Ache Prismalo 3mm lead range and the Caran d'Ache Supracolor 3.7mm artist's range. These colours are great when you blend them in strokes or follow curvature and then use a damp paintbrush to create water colour paint effects and highlights with minimum effort.
Go easy and don't over wet or over draw. Be patient as you can slowly build more colour layers once its dry.
Felt Pens
Felt pens by Pantone can be used to great effect. The flesh tones can be used for skin areas like arms and legs and faces. They give good non-blotching colour on layout paper. Some people like to colour the sketches they make using felt pens always. That's fine if that's your style, but do use quality felts as some cheaper versions run and blotch over outlines.
Fine Drawing Pens
Today a huge range of wonderful fine pens exist at about a fifth of the price of lesser models of twenty years ago. They can be used over a coloured sketch to sharpen it up instead of using a B pencil. They are very useful if you're trying to show intricate detail such as embroidery on a design.
Mounting Board for Presentation Work
Work may need to be presented for all sorts of reasons. It might be that you have a college interview or a job to apply for or you may just want to make your work look better for display purposes. So you'll have to learn to mount your work.
You can buy mounting board from good art shops for presentation work. Related or toning colours can be best. For final background boards try fairly neutral, but expensive dusty looking colours such as cream, taupe, olive, sand, grey blue, wine and black. A set of story boards all in one colour can look very attractive and thought out from a presentation point of view. Avoid crude background colours for boards. Aim to make your work have an look expensive look.
You can of course instead use CAD software such as Colour Matters.
A Sharp Knife
You will need a sharp Stanley type knife or surgical craft knife and replacement blades to trim card and paper. Don't try to use anything but a knife of this type to trim a hole out of the centre of a piece of mounting board. Never use a scissors as it will produce a very amateur result.
Metal Ruler
A metal safety ruler will give you better-cutting edges than a wooden ruler that eventually develops little irregularities.
Cutting Board
To cut and trim your work, you can use an old wooden art board, a piece of hardboard or a special self healing plastic mat especially designed for the purpose and available from art shops.
Masking Tape
If you have a sample of fabric you may need to cut out a window in your mounting board and then place the sample behind. Masking tape can be useful for repositioning the sample.
Variety Fabrics
If you need to make a wide range of fabric samples inexpensively use some cake colouring food dyes in cups of hot water and dip in pieces of white or cream fabrics and yarns, lace, braids and ribbons to develop colour scraps to enhance those you may already have. This works really well on pure silk or other natural fabrics or yarns.
Be prepared to knit small squares of fabric from interesting yarns, torn fabric strips, or even weave your own small ribbon fabric sample. Make samples of pin tucked, twin needled, quilted or embroidered pieces that give you a sample fabric as a design source for your fashion drawings.
Book References
Books that may help you include "Fashion Drawing - The Basic Principles" by Anne Allen and Julian Seaman. Also look at "Foundation In Fashion Design Illustration", "Fashion Illustration" or Professional Fashion Design" by Julian Seaman. My favourites include "Fashion Design Illustration: Women" by Patrick John Ireland.
I have been on several of Patrick's courses. I highly recommend his books. He moves with the times and captures the current body silhouette. I found the tuition I gained on Patrick's courses enlightening and it has enabled me to produce templates that work for the school or student beginner situation.

